Jupyter Notebooks
Jupyter notebooks provide a way to run code in an interactive environment. While most prominently used for Python, Jupyter supports a range of languages, such as Julia and R.
Choosing an Approach
There are multiple ways to run Jupyter notebooks on Engaging. The route you choose depends on your needs and level of familiarity with high performance computing environments.
OnDemand Web Portal
The most straightforward way to run a Jupyter notebook is to use Engaging's web portal. While this path is the easiest to set up, it can be limiting if you want more control over your environment or the resources allocated to your notebook.
-
Link to web portal: https://orcd-ood.mit.edu/
-
Select "Interactive Apps" --> "Jupyter Notebook"
-
Fill out the form to request a time limit for your job, number of cores, memory, and Jupyter kernel. The kernel corresponds to the base set of packages that we have installed to the respective Miniforge module.
-
Follow the on-screen instructions to start a session. When the session is ready, click "Connect to Jupyter." From here you can create a Jupyter notebook and select the language or kernel you would like to use.
-
If you want to use a custom Conda environment, you will need to run the following with your Conda environment activated (after installing
jupyterlab):
- You may need to close your notebook and open it again for the new kernel to be visible.
VS Code
First, follow these instructions to set up VS Code to run on a compute node.
Open a Jupyter notebook and click the top-right button to select a kernel. You
can select "Python Environments" for any Conda environments or "Jupyter Kernel"
to find Julia or R environments. If you have installed R with Conda, you can
find your Conda environment under "Jupyter Kernel." jupyterlab must be
installed to your Conda environment.
Port Forwarding
Port forwarding offers the most flexibility in setting up your Jupyter notebook, but the setup is slightly more involved. With port forwarding, the rendering is handled through your internet browser while computation is done on the cluster. This method is more lightweight than VS Code and can be more reliable.
Port forwarding consists of running the notebook on a compute node and then accessing the notebook on your local machine by SSH tunnelling through a login node.
First, request a compute node with the resources you'll need for your Jupyter session (here we are requesting 1 node with 4 CPU cores):
Note
See Requesting Resources for more information.
Make a note of the node that your job is running on by running hostname from
the command line.
Even if you are using a different language with Jupyter, Jupyter is tightly
linked to Python, so you will need to use a Conda environment with
jupyterlab installed:
Now, we can run the notebook. To be able to access it on our local machine, we need to add a few arguments:
port=$(python -c 'import socket; s=socket.socket(); s.bind(("", 0)); print(s.getsockname()[1]); s.close()')
jupyter-lab --ip=0.0.0.0 --port=$port
The port can be any number between 1024 and 65535, and the first command above ensures getting an open port.
When you run the notebook, the output will contain a link with a token that allows you to access the notebook, which will look like the following:
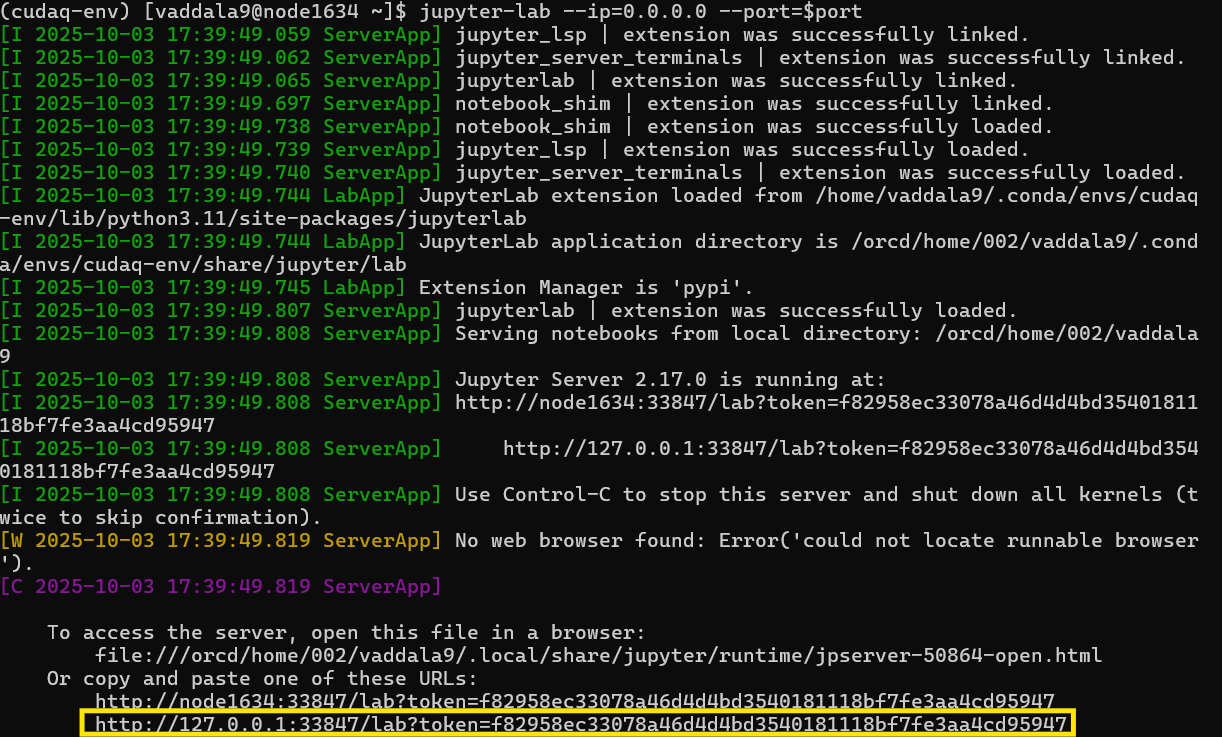
Make sure to select the second URL that is provided as outlined in yellow above. We cannot use this link right away because that node is not available from our local machine. Through "tunneling," however, we can access this node through a login node, which is accessible from our local machine.
In a second terminal window on your local machine, set up an SSH tunnel to your Jupyter notebook that's running on the compute node, filling in the node name, port number, and username as necessary. We will keep the local port and the remote port the same for simplicity.
Now you can access Jupyter in an internet browser using the link we received above.
Open a Jupyter notebook and select your kernel from the top right corner. The Python environment is the same environment you used to run the notebook.
Language-Specific Instructions
You will need to add the IJulia package to your environment for Jupyter to
recognize the Julia kernel. You can do so from the command line:
Unlike R, Julia environments are separate from Conda. However, if the IJulia
package is installed, then the Julia kernel should be visible regardless of the
Conda environment from which you run your Jupyter notebook.
See our Julia documentation for more information.
To run Python Jupyter notebooks, install jupyterlab in whatever Conda
environment that contains the packages you need.
See our Python documentation for more information.
To run R in a Jupyter notebook, you need to create a Conda environment with
both r-irkernel and jupyterlab installed:
module load miniforge
conda create -n r_jupyter_env jupyterlab r-irkernel
conda activate r_jupyter_env
Most R packages are available through Conda, so feel free to install other packages you need in this environment.
See our R documentation for more information.
FAQs
How do I run a Jupyter notebook with a GPU?
The cluster web portals offer an option to allocate a GPU to your Jupyter session. If you would like to use a different partition, however, then follow the instructions for VS Code or port forwarding and request a GPU in your Slurm job. See our documentation on requesting resources for more information.
Jupyter does not recognize the kernel for my environment. What do I do?
First, make sure you have r-irkernel installed if you're using R, IJulia
installed (and built) if you're using Julia, and jupyterlab installed in
your Conda environment.
On VS Code, you may need to specify the path to the conda binary of the Conda
installation you're using. This can be done by editing the "Python: Conda Path"
setting. For example, if you're using the miniforge/24.3.0-0 module on
Engaging, the path would be:
To see all kernels that Jupyter recognizes, activate a Conda environment with
jupyterlab installed and run jupyter kernelspec list.
I tried to install jupyterlab in my Conda environment, but the installation failed. How can I run a Jupyter notebook with the dependencies I need?
It's best to install the packages you need when you create a Conda environment rather than one-by-one after the environment has been created. This will make Conda more likely to solve your environment successfully. For example:
See Conda Environments for more information.
How do I access my lab's storage from Jupyter?
By default, Jupyter treats the root directory as whatever directory you started Jupyter from. If you're using the OnDemand web portal, this is your home directory. This effectively blocks you from navigating to other paths, such as /orcd/data or /orcd/pool, where many groups have dedicated shared storage.
To get around this, you can create a symlink in your home directory: